Let's Develop as a Team on GitHub
For those of you who have registered a GitHub account but don't use it because you're not a developer, here's a brief guide on how to use it.
This is aimed at participants of the TOMODACHI Boeing Entrepreneurship Seminar 2025, hosted by the U.S.-Japan Council—Japan (a public interest incorporated foundation) and organized by Code for Japan, but external visitors are also welcome to read it
Hello. I’m Soumame. I’m writing this note to share things that might be useful when everyone spends the next two months building a product online. This time I’ll explain GitHub. I’ll explain it for those who’ve heard the name but never used it, or are complete beginners.
By the way, this note is also managed on GitHub.
What to do with files when developing as a team?
When you create an app, the data is often called source code. When a team creates documents, people often use cloud storage like Google Drive to share them. But Google Drive can’t always track file history in detail, and imagine multiple people start editing the same file (think of a PDF rather than a Google Doc) on their own computers and then each overwrite-upload it to the cloud.
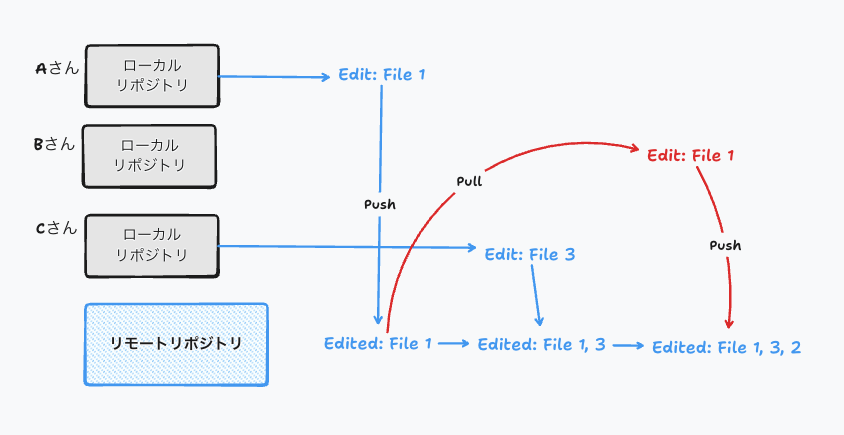
Person A edits the first paragraph and uploads first. Person B edits the second paragraph and uploads third. Person C edits the third paragraph and uploads second.
In this case, the final file will only have B’s edited second paragraph. That’s because A and C’s uploads weren’t reflected on B’s computer, and the file gets overwritten. No error occurs, so the upload succeeds normally. You could avoid this by editing one at a time, but that’s tedious. Having to coordinate upload timing with A and C every time is risky and inconvenient.
What is Git?
This is where Git comes in.
Git records and tracks file changes and makes version control easy. It lets you record who changed which file and what changed compared to previous content as a history (for an easy-to-understand explanation, see What is GIT? Explaining Git concepts - Git - Qiita).
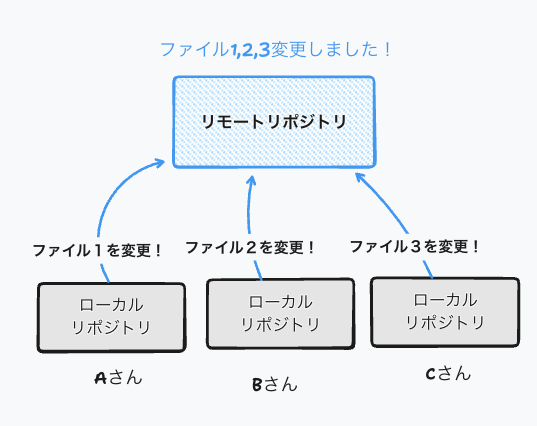
With this system, repositories (project file storage) are distributed. Editors modify the local repository (the files on their own computer) directly, and when they’re done they upload to the remote repository. This upload is called a push. Then you reflect what’s on the remote repository to your local repository by pulling it.
Because pulling automatically could suddenly change files while you’re working, users need to perform the pull operation themselves. For when to pull, check something like When to pull (GitHub).
If edits overlap, a conflict occurs, which prevents silent overwriting. This helps avoid losing important content everyone wrote.
There’s a lot more to explain about branches, merges, and so on, but the topic is deep and would take forever to cover. Look those up when you need them.
What is GitHub?
So where do you put the remote repository? In most cases, people use GitHub. You may have heard the name. GitHub adds features beyond Git itself, like document and project management and issue tracking, making it very convenient. It was developed by GitHub, Inc. in the U.S., and has been under Microsoft since 2018.
Let’s write some code
“Write code already!? I’ve never programmed before!” — don’t worry. Once you learn the basics you can even have AI write programs for you. Of course you’ll eventually need to understand what the AI is doing, but trying to understand everything from scratch during these two months of the hackathon is unrealistic, so let’s get hands-on for now.
Create an account
First, create a GitHub account. The official site explains how to do this, so follow that. Creating an account on GitHub - GitHub Docs
If you’re stuck, try this guide: How to create a GitHub account
About the Student Pack
As a side note, students can apply for the Student Pack, which provides free subscriptions to many development tools. Definitely apply if you’re eligible.
Apply to GitHub Education as a student - GitHub Docs
One of the most exciting tools available through the Student Pack is GitHub Copilot. GitHub Copilot is an AI assistant that helps while you write code in your IDE (described below) and answers questions.
Install an editor to write code
Once you’re ready to store code, the next step is to set up a place to write it. Typically people use an IDE (Integrated Development Environment), which provides many features beyond plain code editing. Modern editors are smart enough that some include AI and can do tasks for you just by describing what you want.
Here are IDEs likely to be used in this hackathon:
- VS Code
- The first choice for web app developers. It’s an editor developed by Microsoft and runs on most OSes like Windows, macOS, and Linux. Strictly speaking it’s not an IDE, but you can turn it into one with extensions.
- It can also be used to build cross-platform apps for Android/iOS.
- Commonly used for TypeScript, JavaScript, Python, and similar languages.
- Cursor
- An editor based on VS Code with very strong AI features. It can write code for you automatically. These features are paid ($20/month).
- Xcode
- The editor used for developing iOS apps. If you’re building apps in Swift (Apple’s language), it’s required. It runs only on macOS.
- Android Studio
- The editor used for developing Android apps. It includes all the tools needed for Android development.
Unless you’re already writing code, VS Code is probably the best bet, so I’ll assume VS Code for the rest of this guide.
Create a remote repository
First, create a “remote repository” on GitHub to store your source code. This is like a shared project file storage that the whole team can access. 🗂️
- Log in to GitHub, click the ”+” icon in the top-right, and select “New repository.”
- Choose a Repository name. Enter an easy-to-understand name in English (e.g.,
tomodachi-product-2025). - Optionally write a short Description explaining what the project is.
- Choose the visibility. “Public” means anyone can see it; “Private” means only invited people can see it. For team development, “Private” is fine at first.
- Check “Add a README file”. A README acts like the project’s manual, and having one file to start with makes future operations easier.
- Click “Create repository” and your remote repository is ready! 🎉
Clone to create a local repository
Next, copy the remote repository you created on GitHub to your computer. This operation is called “cloning.”
- Open the repository page you just created.
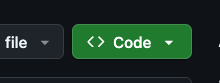
- Click the green ”<> Code” button, then click the copy icon to the right of the displayed URL to copy it.
- Open VS Code.
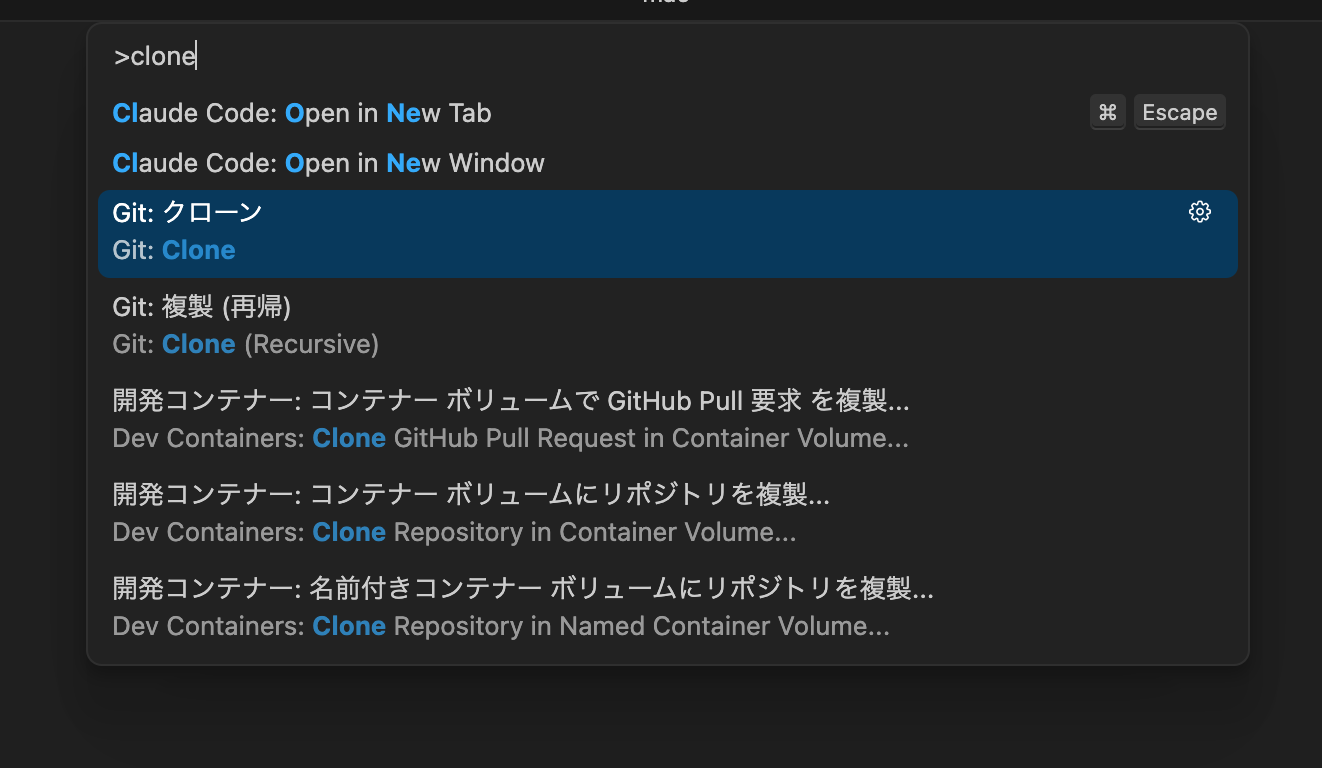
- From the top menu select “View” → “Command Palette”, type “Git: Clone” and select it.
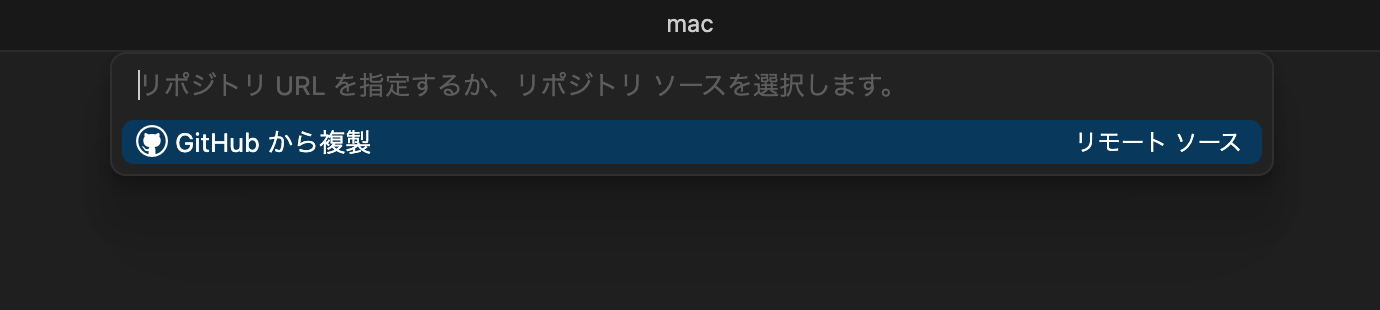
- Paste the URL you copied and press Enter.
- Choose a location on your computer to save the project (Desktop or Documents folder are common choices).
- When the clone finishes, a prompt asking “Open the repository?” will appear in the bottom-right — click “Open.”
Now the project files (for now just README.md) are on your computer!
Try editing
Let’s edit a file. Try writing a short self-introduction.
- In VS Code’s Explorer on the left, click to open the “README.md” file.
- Add some text to the file. For example:
.md files differ from .txt files in that they use Markdown syntax, using symbols like # and * to set heading sizes and emphasis. For more details, see Write using Markdown syntax
# TOMODACHI プロダクト

これは私たちのプロダクトです。

## メンバー
- そうまめ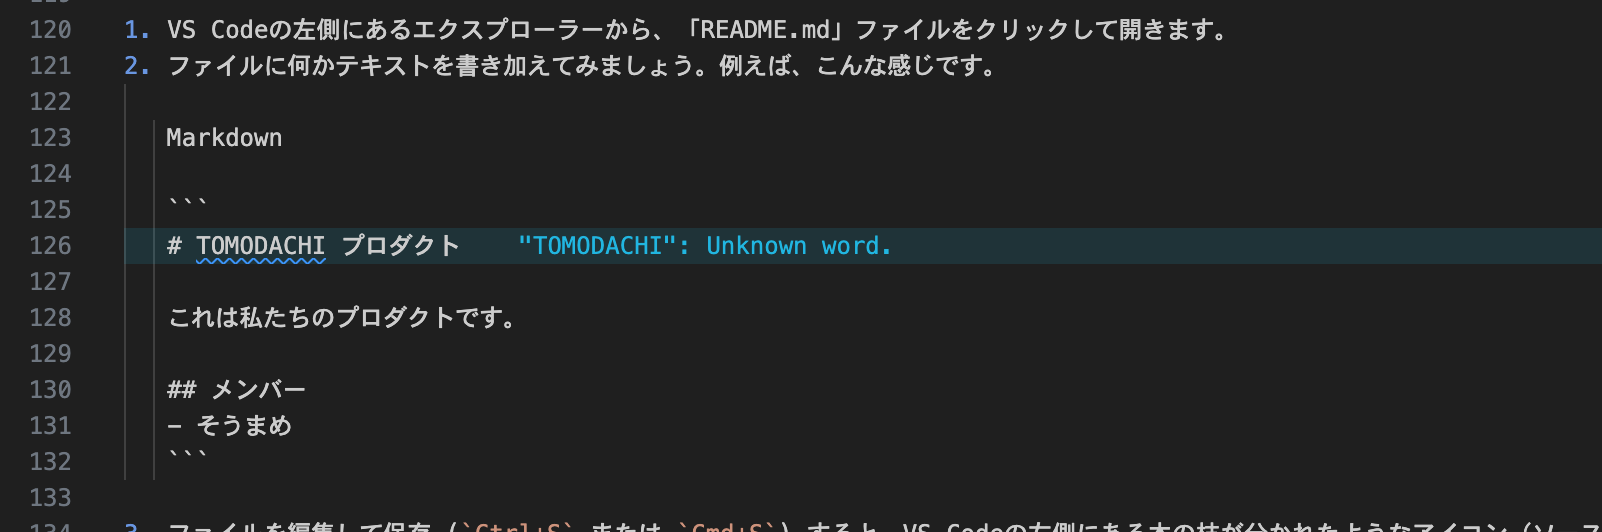
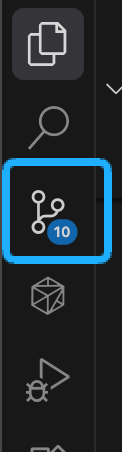
- Save the file (Ctrl+S or Cmd+S). The Source Control icon (a branching tree icon) on the left of VS Code will show a badge indicating changed files. This means “there are modified files.”
Push
Now upload your edits to the remote repository on GitHub to share them with your team. This operation is called a “push.” Pushing is divided into several steps.
-
Staging: Choose which changes to record. This happens on your computer, so nothing is reflected on GitHub yet.
- Open the Source Control panel to see edited files (e.g., README.md) listed under “Changes.”
- Click the ”+” icon to the right of the file name to stage the change.
- The file will move to the “Staged Changes” list.
-
Commit: Record the staged changes to your local repository with a message. This still doesn’t affect GitHub.
- In the message box above the staged changes, enter a short message describing what you changed (e.g.,
Add my name to members). - Click the “Commit” button. This records the change in your local commit history.
- In the message box above the staged changes, enter a short message describing what you changed (e.g.,
-
Push: Send the commits from your local repository to the remote repository.
- The “Commit” button will change to “Synchronize Changes” — click it.
- Your changes are now uploaded to GitHub! Reload the repository page in your browser to confirm the update.
Example: this blog site
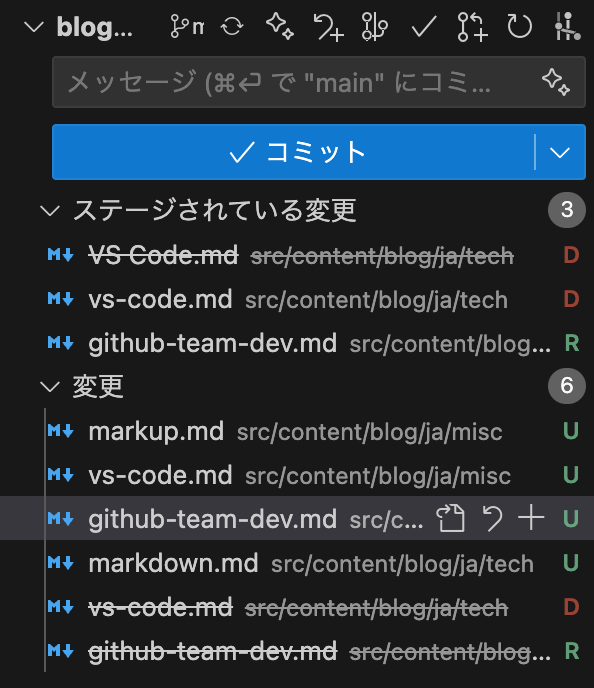 Right now, as I’m uploading this article, I’m using Git. VS Code visually shows staged changes like this. In the staged changes view, a red “D” means Deleted, and “R” means Renamed.
Pull (when there are remote changes)
When someone else on the team pushes, the remote repository may be newer than the files on your computer. Bringing the latest remote changes to your machine is called a “pull.”
Get into the habit of pulling before you start work or at convenient points; it reduces conflicts where your work collides with others’.
The operation is simple: click the “Synchronize Changes” button in VS Code’s Source Control panel or run “Git: Pull” from the Command Palette. If there are new changes, your local files will be updated automatically. 🔄
0 people clapped 0 times
Related articles
🍳 XR's Use Might Be as a HUD - Let's Cook with AI
XR's Use Might Be as a HUD - Let's Cook with AI
I borrowed an inmo XR — Android-powered XR glasses — from Ukai, familiar from Mitou Junior, and did a little hackathon. After struggling with what to use it for, I built a cooking assistant to enjoy with an AI. I tried using the XR glasses to cook with AI, so I'll introduce that here.
🤖 Let's Read Google Sheets via API!
Let's Read Google Sheets via API!
This is a re-publication of an article I wrote on another site last year.
It's super easy. I'll...
🗓️ Thoughts on Life Logging Systems
Thoughts on Life Logging Systems
With the advancement of LLMs, it has become easier to verbalize human behavior and analyze conversations with others. However, I felt that none of it quite fit, so I thought about various aspects from both technical and usability perspectives.
🤖 Can the use of LLMs be detected?
Can the use of LLMs be detected?
Have you ever been banned from using AI tools like ChatGPT (LLMs) at school? For a while OpenAI and others published experimental software to detect text written by LLMs, but nowadays such tools are hard to find. Is it actually possible to reliably detect the use of an LLM?